
Usually, a trip “home” to Ithaca, NY means a lot of beautiful experiences, and this long weekend trip was no exception! From sunrise on the lake (with Dad in a fishing boat!) to blueberry picking with Mom to local beer-tastings with dear old friends, this past weekend had a lot of lovely moments.
 However . . .

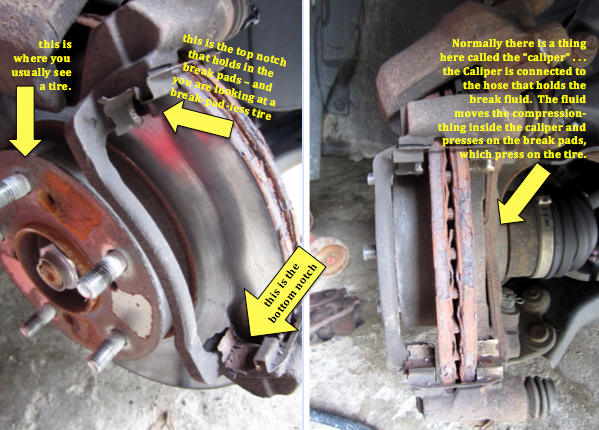
. . . getting home turned out to be a bit more of a pill than usual. On the usually 5.5-6 hour drive home, I got a flat tire. Then I got another one. Lets just say by the time I got home, it was a good 12 hours after I’d begun driving, and I was new-best-friends with a lovely woman named Deborah at the Honda dealership in Oneonta, NY. Four tires later, our local mechanics let me know that I ALSO happened to have a little issue with my break pads. . . a little issue with the fact that they were 90% worn away.
Woof. Thankfully, I have a father who is a genius with car maintenance of all kinds. Determined to gain myself a new skill, I decided to learn from the master (Dad) and DIY the heck out of this task. I am going to share my newly acquired skill, but you should know that I will be doing this in completely non-technical terms, which only befits my actual skill-level.
First, we assembled the tools needed.
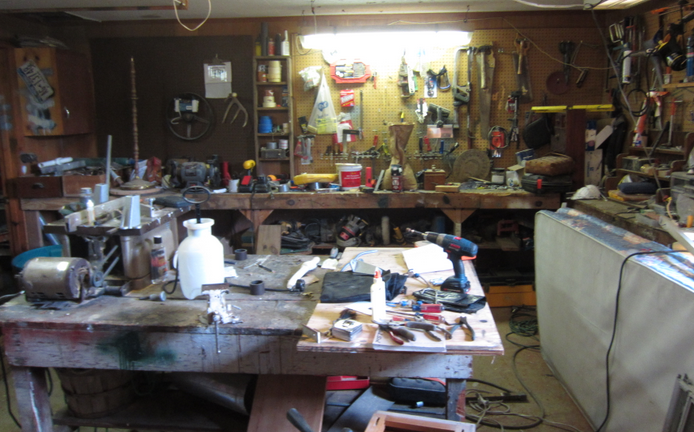
My Dad has an incredible (and incredibly disorganized) workbench (as you can see in the picture above). This is like the Room of Requirement for people who need to work on cars. Inside, we (ahem: Dad) found everything we needed for the job ahead. That would be (from left to right in the picture below): a ratchet wrench, a screw driver (not a phillips-head!), a C-clamp, some Caliper grease, a set of wrenches, a few different sets of ratchetty-top-things. Not pictured: we also used a hammer-wrench (to get the bolts off the tires easily) and a big jack (to hold up the car).

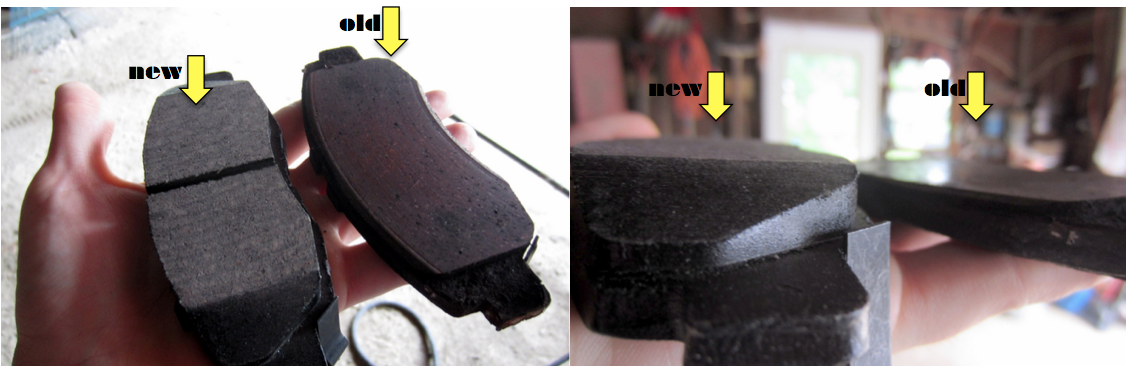
After we had the requisite tools and had taken the wheels off of the car while it was jacked up, we started by removing the bolts from the Caliper (with the ratchet wrench), and taking that off of the wheel well. You have to do this part carefully because you don’t want to have anything happen to the hose that connects it to the rest of the car. We sort of gently balanced the caliper on the top of the tire-mount-thingy. Then you take out the old brake pads (see above). Which leaves you with something like this:
At this point, use the C-clamp to push the compressor piece back in on the caliper.
See the pushed-out thing below?

image source, other image source
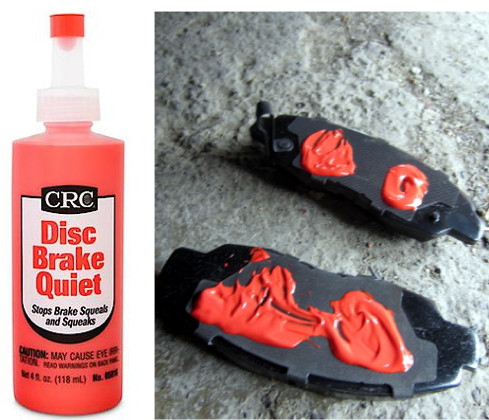
Just make sure the C-clamp is placed inside the caliper, not on the rim anywhere (because if it is on the rim, then you will wind up bending this piece of the caliper and the breaks won’t work as well.) Once that is pushed in, then you are gonna want to prep the new brake pads. This involves taking something called Disc Brake Quiet (or, as I like to call it: Red Goo), and putting some (not too much) on the two outside parts of the new brake pads that are going to touch the caliper. This will keep the brake from squealing or making any unhappy noises.
Then, with a little care to not get red goo on yourself, you slide the new brake pads into the notches we saw earlier, red goo side facing out, and then all that remains is to screw the caliper back on nice and tight (with your ratchet wrench!).
 The last step, once the caliper is re-attached, is to put the wheel back on and take your baby for a test-drive! Be sure to hit the brakes hard a couple of times, just to make sure you did it correctly! Oh, and remember to congratulate yourself, because you just saved yourself some money and learned to change your own brake pads!!!
Isn’t that cool?
